In this example we find out how you can easily control central heating remotely via a simple text message-based system.
RF Solutions’ EZTEXT is a powerful GSM text message-based remote control system which can be used for a huge variety of applications. The simple to install system allows you to switch almost anything, anywhere in the world using your mobile phone. You set up a secure password, custom names and notifications directly via SMS text message and can then enjoy convenient, flexible control – whatever your location.
EZTEXT for heating
Recently we’ve had a large number of customers telling us that they’re using EZTEXT to control heating in holiday homes. So, to make life easier for future customers, we put together the following application example which describes in detail how we wired in a boiler to the EZTEXT so we could remotely switch on/off our central heating by simply sending a text message. The example describes a method which can be applied to almost any make or model of boiler.
Please note that this application example is just that – we recommend that only a qualified, competent person undertake the described operation and that they use their discretion when considering our example.
What we used
1. RF Solutions EZTEXT
2. A SIM card with credit/contract
3. 12-24VDC power supply
4. A boiler with wired thermostat
What we achieved
We wired the EZTEXT as an override for the boiler thermostat and set the boiler to run on the timer when the thermostat called for heat. In this way the boiler was off all the time, unless the EZTEXT ‘enabled’ the thermostat – at which point it ran according to the timer – to the preconfigured temperature until the EZTEXT turned it off again. We could likewise have set the boiler to run continuously and controlled the run time directly from the EZTEXT by sending the appropriate message to turn the heating on continuously or after just a few minutes or hours.
How we did it
We set up the EZTEXT on a work bench first, then with it fully configured, we installed it in the final location – this saved time and helped us understand how it all worked easily. After unpacking the EZTEXT, we inserted a working SIM and powered it using a 12VDC power supply. We checked SIGNAL LEDs on the EZTEXT to ensure we had enough signal strength using the internal antenna:
0 = Not enough signal to work correctly
1 = OK
2 = Good
3 = Excellent
Configuration
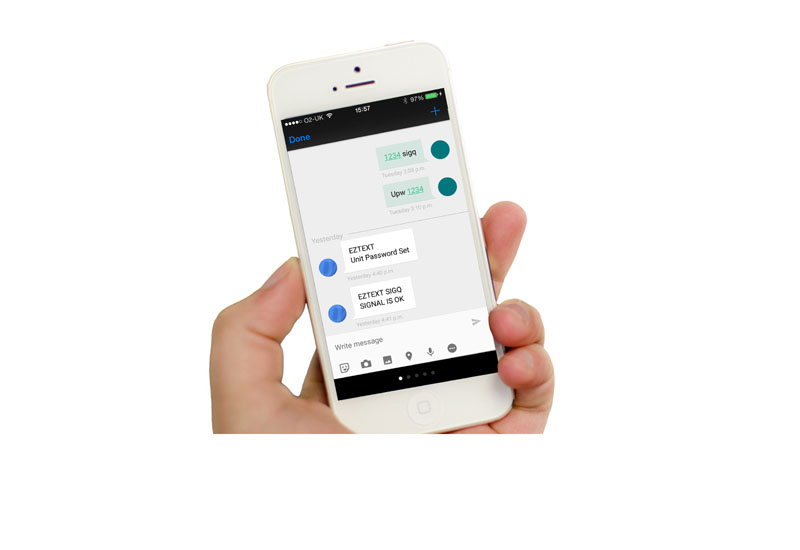
We then set the EZTEXT up with a password and gave it a name, before renaming the output to make it easier to understand what was going on. Note: After turning on the power you must send the first text message within two minutes, or EZTEXT will not accept it.

SET THE PASSWORD
Send message: UPW#12345 Receive response: UPW OK Result: Password now set to 12345, all future messages must now use this password as a prefix.
SET THE UNIT ID
Send message: 12345#UID#My House Receive message: My House UID OK Result: The EZTEXT is now called ‘My House’
SET THE OUTPUT NAME
Send message: 12345#OPNAME1.Central Heating Receive message: OP Name 1 Central Heating OK Result: Relay switch 1 is now named ‘Central Heating’
TURN OUTPUT ON OR OFF
Send message: 12345#Central Heating ON Receive message: My House Central Heating ON OK Result: I’ve activated Relay 1 (CH1 on the board) changeover contact.
It’s worth noting that we could have set up more features, such as power failure number to text and (if we’d installed the EZTEMP add-on) a trigger temperature for the EZTEXT – useful if you want to receive a text if the temperature gets near freezing. After we’d finished, we powered down the unit and moved it to the final installation location.
Installation
We then installed the EZTEXT next to our boiler thermostat on the wall (a template is provided in the datasheet manual). We used the PSU-12V1AIN-IP from RF Solutions stock to power the EZTEXT and plugged it into a nearby socket. We then had an engineer isolate the power in the house and wire in the EZTEXT to the boiler thermostat. This was actually a very simple process – he removed the thermostat cover, then the permanent live and wired it to the COM on the EZTEXT relay. He then wired the NO on the EZTEXT back to the thermostat permanent live input – easy as that!
After the EZTEXT was wired in, the power was restored and the thermostat was effectively disabled. We set the heating timer up normally and tried the thermostat – whilst it still clicked when it went above the room temperature, the boiler didn’t come on at all, as we expected.
We sent the text “12345#Central Heating ON” to the EZTEXT, it replied and the relay could be heard to click over. After this point, the heating came on and ran according to the thermostat temperature. Job done!


