In medical locations, it is necessary to ensure the safety of patients likely to be subjected to the application of medical electrical equipment. Here, Dale Fisher MIET MIHEEM MSOE, looks at the considerations that professionals need to make when installing equipment in such locations.
Introduction
It’s important to start this article by explaining some of the references that are made throughout:
EBB = Equipotential Bonding Busbar
SEBCP = Supplementary Equipotential Bonding Connection Point
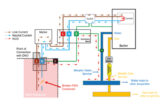
Medical location = a location (area or room), where medical devices with applied parts are used, intended for purposes of diagnosis, treatment including cosmetic treatment, monitoring and care of patients.
CPC = circuit protective conductor
Group classifications
Medical locations are divided into Group 0, Group 1, or Group 2.
In medical locations of Group 1 and Group 2, (this is referenced in the (IET and BSI, 2022) BS 7671 Table A710), the resistance of the protective conductors between the earth terminal of any socket-outlet (or fixed equipment) and any exposed-conductive-part and/or extraneous-conductive-part shall be such that the voltages of 25 V AC or 60 V DC are not exceeded, and the measured resistance between the earth terminal of any socket-outlet (or fixed equipment) and an extraneous-conductive-part shall not exceed 0.2 Ω.

What does this mean exactly?
Any point in the location, inclusive of conductive fittings, socket-outlet earth pins, SEVBCPs, all being connected to the EBB, shall have a maximum resistance of 0.2 Ω. Something to consider is that if you could aim for closer to 0.1 Ω with your design, this will put you in a more comfortable position when commissioning.
Also, just be mindful that whilst 0.2 Ω is conforming, readings that are closer to 0.2 Ω should really be looked at because, as mentioned previously, a reading closer to 0.1 Ω than 0.2 Ω is more suitable.

Worked example
To provide a bit more clarity to all these figures and words, I will now detail a worked example using the figures given in the On-site Guide Table I1 Appendix I ‘resistance of copper and aluminium conductors’ (IET, 2022) (pictured below).

In my experience, I’ve found that it is better to work backwards when calculating the CPC size, because the limitation is at the end of the CPC circuit which is 0.1 Ω (0.1 being a better figure to design to than 0.2).
Therefore, if we can calculate the CPC from the furthest point to the EBB, then from the EBB to the earth bar (preferably a new dedicated earth bar within the electrical cupboard serving the medical location), then from the earth bar to the main existing earth bar (usually located within the main LV switchroom or electrical intake room), then we can justify our design proposals, and hopefully control the parameters of our earthing system for the medial location.
Consideration needs to be made when sizing the CPC to install between the EBB and the socket outlets for instance, because there is a maximum cable size that the terminals can take. There are many socket manufacturers where the maximum size their socket will take is 6 mm.
So, we can use 6.0 mm cable as the first point of call for our cable selection.
I calculated a maximum of 30 m from my EBB to my furthest socket outlet or equipotential bonding connection point (whichever is furthest away). The 30 m is mentioned in the starskstrom guide (Starkstrom, 2016) which suggests 30 m for 6.0 mm and 21 m for 4.0 mm earth cable).
It is also worth noting that the 30 m cable would be the installed cable length, and not the direct line of sight between the two points.

When deciding which Ohm figure to choose from in table I1, we need to choose the ‘–’ figure, as the other figures are for use when the ‘protective conductor’ is installed alongside the ‘line conductor’ (multi-core cable for instance).
Using my 6.0 mm figure, you can see that the figure is 3.08 milliohm per meter.
I divided the figure in Table I1 by 1,000 (as this is detailed in milliohm, which is 1,000 Ω), as we want to calculate ohms in this instance, not milliohms. Therefore, 3.08 / 1,000 = 0.00308 Ω.
I can then multiply this figure by my maximum length of cable (30 m because of the maximum terminal capacity). 0.00308 x 30 = 0.092 Ω
I then had a distance of 30 m from my new earth bar to my EBB.

The size of this cable is personal preference as a starting point (but always better to look at the other sizes). I chose to go with 16 mm. Again, using the table I1, I use the figure of 1.15 Ω. 1.15 / 1,000 = 0.00115 Ω
0.00115 multiplied by my length of run (which is 30 m) is 0.00115 x 30 = 0.035 Ω
I then had a distance of 160 m from my main earth bar to my new earth bar within my scheme. I chose to go with 35 mm. Again, utilising the table I1, I use the figure of 0.524 Ω. Therefore, 0.524 / 1,000 = 0.000524 Ω
0.000524 multiplied by my length of run (which is 160 m) is 0.000524 x 160 = 0.084 Ω
If we add all of these figures together, we then get the following result:
0.092 + 0.035 + 0.084 = 0.181 Ω
As you can see, I’ve designed the earthing system for my medical location to produce a reading below the 0.2 Ω.
As with everything I do, there is an element of engineering judgement, aligned with experience, industry legislation, and guidance. If something doesn’t feel right, raise your voice and air your concerns.
Key references:
* IET. (2022). On-Site Guide. Institution of Engineering and Technology.
* IET and BSI. (2022). Requirements for Electrical Installations. Institution of Engineering and Technology.
* Starkstrom. (2016). Technical Guide – For Designers and Specifiers of Medical Facilities.